
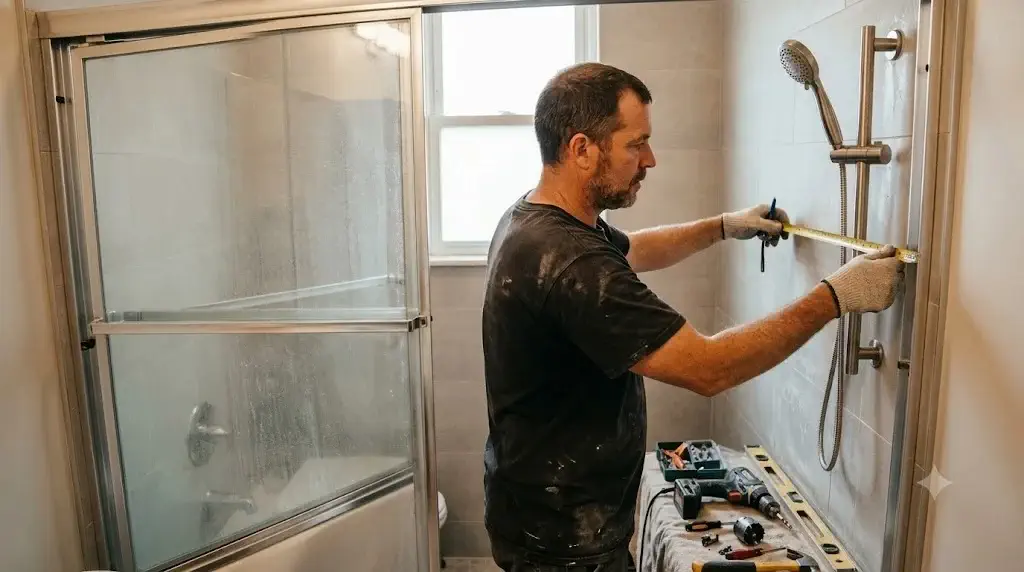
How to Install a Sliding Door Handheld Shower Bar Safely
Executive Engineering Summary: Handheld Slide Rail Installation
Failing to master how to install sliding door handheld shower bar safety protocols risks crushing injuries if the slider rail strikes retracted glass panels or shearing if users grab unreinforced fixtures during a slip. When retrofitting slide-grab bars adjacent to glass tracking, installers must maintain a 3-to-4-inch buffer from metal jambs, anchor exclusively into studs or heavy-duty hollow fastening assemblies, and use specialized extra-long hoses to ensure seated accessibility without pulling on the mount.
- Structural Anchoring Priority: Standard adjustable slider bars have zero load-bearing capability; ADA dual-purpose slide-grab bars must be used to ensure they can sustain 250-lb fall impacts near entryways.
- Enclosure Clearance Metrics: Fasteners must be mounted at least 3 inches from sliding glass door tracks to prevent sliding handles, wand mounts, and hardware from interfering with panel pathways.
- Installation Margin of Error: Wall studs must be probed and centered; through-tile installations require precise 1-1/4-inch diamond core bits and expansion fasteners to support both shearing and vertical hand forces.
- Bathing Safety Context: Secure sliding bars are the foundation of bathing transfers; always link them with robust shower safety bars and companion shower bench setups for complete accessible support.
Quick Reference Specification: How to Install Sliding Door Handheld Shower Bar
The how to install sliding door handheld shower bar checklist involves evaluating spatial clearances, wall reinforcement systems, drilling requirements, and structural loads. The matrix below benchmarks key technical specs, clearance tolerances, and installation requirements:
| Mechanical Parameter | Direct Structural Stud Mount | Hollow Wall Mounting (No Stud) | Physical Safety & Usability Impact |
|---|---|---|---|
| Safety Class Rating | ADA Compliant (Dual Grab & Slide) | ADA Compliant (with RC-SSB-W35) | Dual-purpose grab bar prevents fall failures |
| Track Buffer Distance | 3 to 4 inches from frame jamb | 3 to 4 inches from frame jamb | Prevents sliding glass doors from catching bar attachments |
| Anchor Requirement | #10 or #12 3.0″ stainless screws | WingIts hollow-core anchors | Drywall plugs, toggles, or adhesive will fail under load |
| Ideal Height (ADA §608) | Vertical from 33″ to 60″ above floor | Vertical from 33″ to 60″ above floor | Ensures seated, standing, and child bather reach |
| Standard Hole Diameter | 3/16″ or 5/32″ pilot holes | 1-1/4″ (32mm) core holes | WingIts require large core drills; wood studs need pilot drills |
| Wand Hose Length | 69″ to 80″ heavy-duty stainless steel | 69″ to 80″ heavy-duty stainless steel | Extended hose length supports wheelchair/seated showering |
| Shear Load Threshold | Exceeds 500 lbs force load | Exceeds 300 to 600 lbs force load | Handles critical leverage if the senior slips near door tracks |
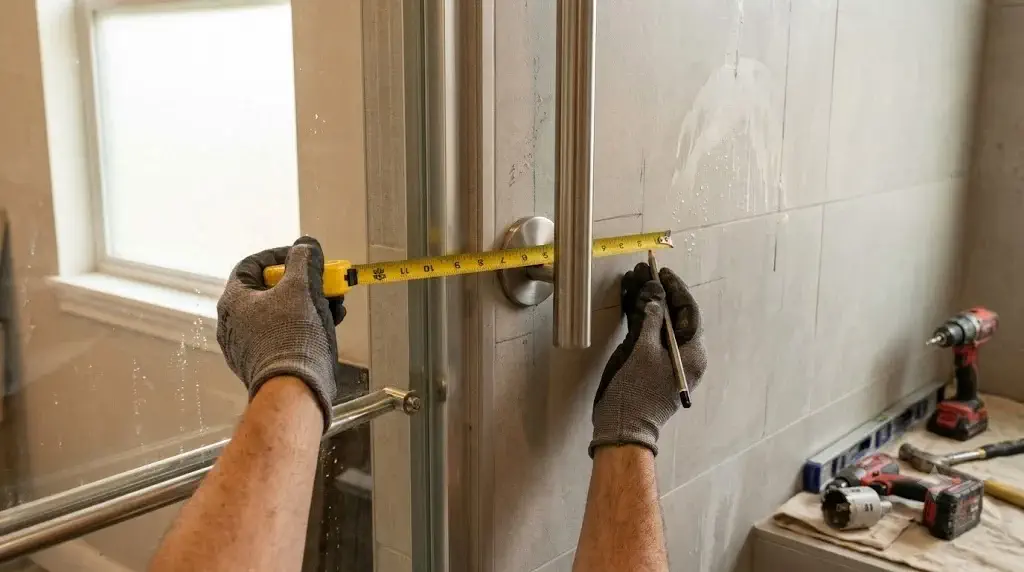
Safety measurements: mounting a dual grab-slide bar alongside sliding glass door metal tracks with a minimum 3-inch margin to prevent obstruction.
Metal Door Track Framing Requires 3-Inch Safety Clearances to Prevent Obstruction
Installing fixtures adjacent to rolling sliding doors requires precise spatial tracking to prevent physical collisions. Glass sliding doors utilize extruded aluminum tracks and metal frame jambs that span 1.5 to 3.0 inches in depth. If a sliding shower bar is mounted too close to this metal channel, the sliding adjusters, handheld wands, and flexible water hoses will obstruct the sliding glass door’s path or crush fingers.
To assure seamless operations, installers must maintain a minimum 3 to 4-inch (76 to 102mm) safety margin from the outermost edge of the door track to the center of the bar’s mounting flange. This buffer allows the user to open the sliding door entirely without the glass panel, door handle, or top rollers striking the handheld bracket assemblies.
The process of how to install sliding door handheld shower bar systems always begins by mapping out the vertical travel of the wand bracket. Before drilling any holes, slide the bracket from the top of its range to its lowest setting, then open and close the shower door. This test verifies that the hose and adjustment knobs do not catch on the door, frames, or tracking.
Standard Shower Slide Rails Lack Structural Ratings and Fail Instantaneous Fall Loads
Standard adjustable shower slide rails are designed strictly to hold the weight of a lightweight water spray wand. Made from thin-gauge brass, plastic, or composite materials and secured with small drywall anchors, these non-structural rails cannot support more than 15 to 30 pounds of force. If a senior loses their footing near the entrance and grabs a standard slider bar, it will pull free, leading to a fall on the wet floor.
In an accessible bathroom, any wall-mounted slide rail near door transitions must be a certified ADA dual-purpose grab-slide bar:
- 18-Gauge Stainless Steel: Meets ADA §609 specifications with a 1-1/4 to 1-1/2-inch outer diameter and a textured surface to prevent hands from slipping on wet metal.
- 250-Pound Load Support: Structural wall-mounting flanges must withstand 250 pounds of downward, lateral, and pull-out force.
- Dual-Function Handset Holder: The sliding hand shower holder must glide smoothly, lock firmly, and feature an oversized, ergonomic handle that older adults can operate despite arthritis or limited grip strength.
To make sure these heavy-gauge, dual-purpose rails have the structural support they need, install them using professional ADA grab bar fasteners that are engineered for high-tension and shear loads on tiled walls.
Structural Wall Stud Finding Confirms Solid Blocking Behind Finished Wet Tile
Drilling into finished tile adjacent to glass framing requires meticulous sub-wall validation to avoid puncturing structural components. The installer must verify stud locations, verify framing depths, and prepare the tile correctly to prevent fracturing the material.
Follow this technical field guide to secure the sliding shower bar:
- Mark Elevation Points: Establish the vertical height. The sliding bar must span vertically from 33 inches to at least 60 inches above the finished floor to be easily reachable for seated and standing bathers alike. Use a level to ensure the bar is perfectly plumb.
- Probe Sub-Wall Studs: Find framing studs near the glass track with a stud finder, then verify them by drilling 1/16-inch pilot holes through the grout lines. If no stud is centered within your 3-to-4-inch door buffer, you must use engineered hollow-wall fasteners like WingIts.
- Pre-Drill the Tile: For wood studs, drill 5/32-inch pilot holes with a water-cooled diamond bit. If using WingIts, use a 1-1/4-inch diamond hole saw at a 45-degree angle to start, then slowly straighten it, keeping it wet to prevent the tile from cracking.
- Apply Waterproof Sealant: Fill the holes with 100% silicone sealant, insert the anchors, and secure the mounting brackets with #10 or #12 3.0-inch stainless steel screws. Compress the gasket to keep water out of the wall, then mount the escutcheons and slider bar.
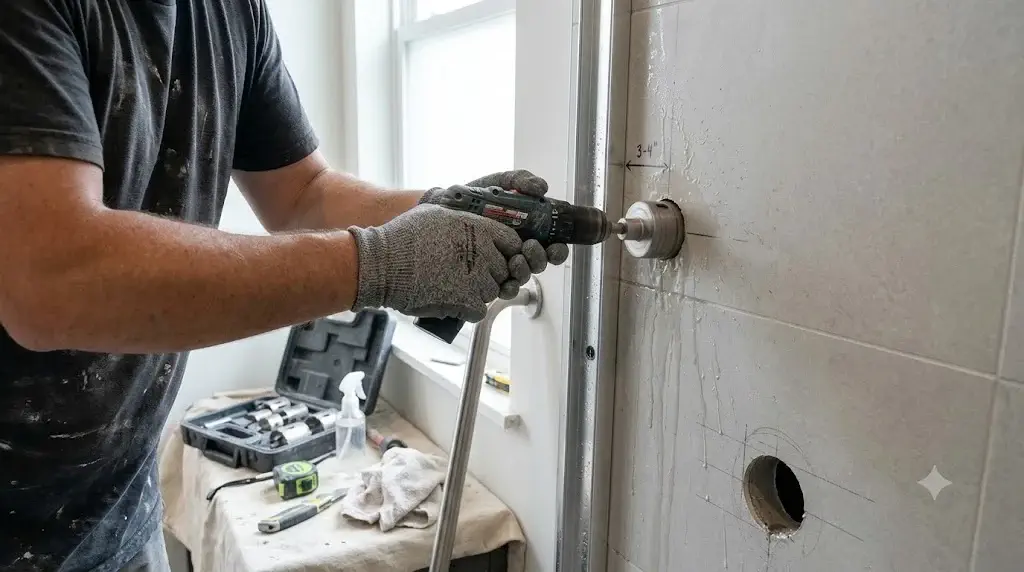
Precision drilling: a 1-1/4-inch diamond hole saw cutting through ceramic tile alongside a sliding door tracking frame to receive hollow wall anchors.
Extended Handheld Shower Hoses Enable Flexible Water Direction Without Strain
Bathers seated on shower benches or in wheelchairs often cannot use standard 59-inch handheld hoses. A 59-inch hose is too short to allow a seated senior to reach their back or feet without stretching the hose tight. This strain pulls on the sliding bar assembly and can cause tipping or slipping hazards for the user.
To prevent tension on the sliding mount and ensure the wand is easy to reach, choose an extra-long, 69-inch to 80-inch flexible stainless steel hose. The extra length lets seated users handle the spray wand easily without putting pressure on the slider bar, the sliding door track, or the water supply line.
The how to install sliding door handheld shower bar guide also stresses using a flexible, double-interlock stainless steel hose rather than a stiff, vinyl-coated hose. Vinyl-coated hoses remain stiff in cold water and tend to twist, which can rotate the wand and bracket. This twist can push the hose or the wand directly into the path of the sliding glass door.
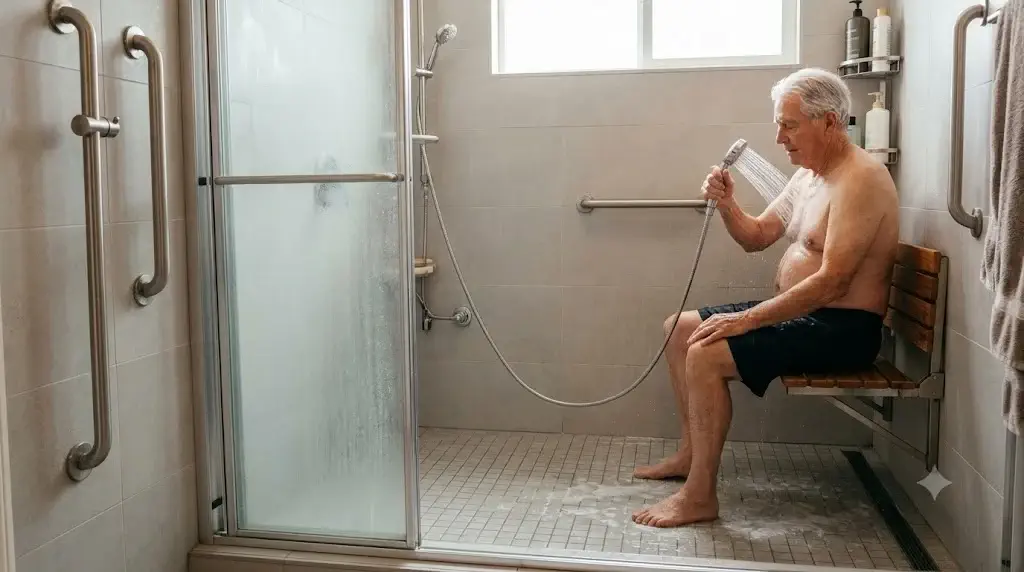
Accessible showering: an extra-long, 80-inch flexible stainless steel hose allows seated seniors to shower safely without pulling on the sliding bar.
Diverse Fastening Options Differentiate System Safety and Ease
Evaluating your installation options is essential to balancing maximum load capacity, ADA compliance, and drilling complexity:
Reinforced Stud/Blocking Mount:
- Delivers maximum load capacity (>500 lbs) for vertical entryways.
- Uses 3.0-inch stainless steel screws driven into the 2×4 framing.
- Requires small 5/32-inch pilot holes, minimizing the risk of fracturing tile.
- Zero flex or hollow wall movement when grab forces are applied.
- Limitation: Bound strictly to the existing stud location, which may clash with door tracks.
Engineered Hollow Anchor Mount:
- Allows the sliding bar to be mounted anywhere to clear door tracks.
- Uses WingIts RC-SSB-W35 anchors to support 300 to 600 lbs of shear force.
- Pre-formed, closed-cell foam gaskets keep wall cavities watertight.
- Saves money on wall remodeling by avoiding the need to add backing studs.
- Limitation: Demands 1-1/4-inch diamond core drilling and hollow wall integrity.
Frequently Asked Questions About Installing Sliding Shower Bars
What are the spacing requirements when installing a handheld shower slide bar near sliding glass doors?
The how to install sliding door handheld shower bar guide requires maintaining a minimum 3 to 4-inch (76 to 102mm) safety margin between the outermost edge of the glass door track and the center of the sliding bar’s flange. This clearance prevents the sliding brackets, adjusters, hand wands, and flexible water hoses from obstructing the door or getting pinched in the sliding frame track.
Is a standard sliding shower bar strong enough to act as a safety grab bar?
No. Standard adjustable slide bars are typically made from thin-gauge brass or plastic, designed strictly to hold the spray wand. They are not built for grab forces and can collapse under load. For senior safety, you must install an ADA dual-purpose grab-slide bar (1-1/4 to 1-1/2 inch stainless steel) that can support 250 lbs of downward force.
Can you mount a sliding shower bar through the metal frame of a sliding shower door?
No. Aluminum frames, jambs, and tracking on sliding doors are built from thin, non-structural metal and cannot handle dynamic grab or fall loads. The sliding shower bar must be anchored directly into the tiled wall, masonry, or backing studs adjacent to the sliding jamb to prevent the assembly from ripping free.
What hose length is best for a handheld shower used by someone seated?
To avoid strain on the slide-grab bar and ensure full reach for seated bathers or wheelchair users, choose an extra-long, 69-inch to 80-inch flexible stainless steel hose. The extra length lets the bather wash comfortably without pulling on the sliding mount or supply elbows.
