
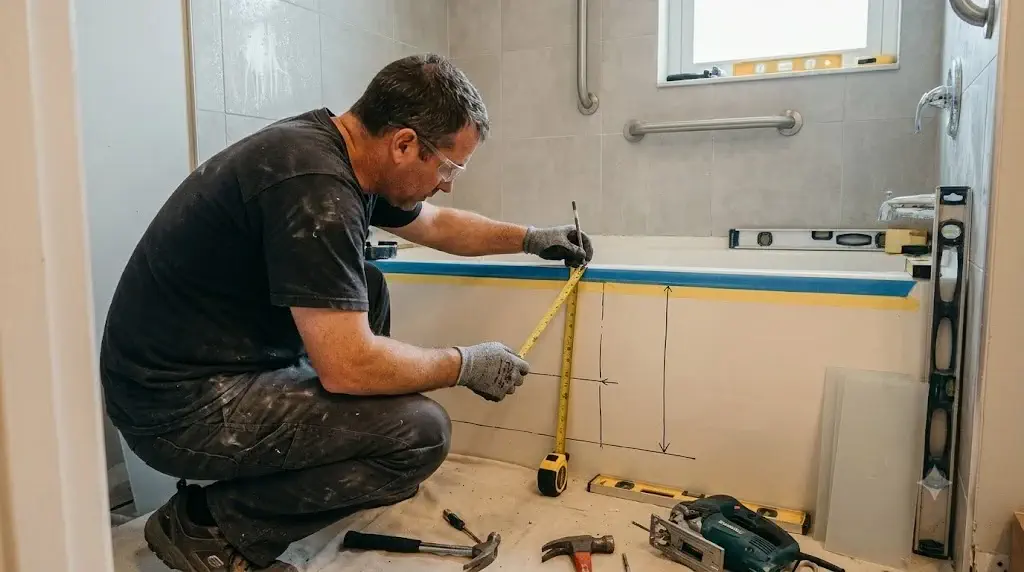
Tub-Cut Conversion Inserts: Step-Through Threshold Installation Guide
Executive Engineering Summary: Tub-Cut Insertion Steps
This tub cut conversion inserts step through threshold installation guide details the precise steps needed to safely convert a standard high-step bathtub into an accessible, low-threshold walk-in entryway. This retrofitting process involves removing a vertical section of the bathtub’s front apron and inner wall, reinforcing the sub-tub floor, and bonding a custom-molded polyethylene or acrylic insert. When executed correctly, the modification dramatically reduces step-over risks without requiring a full bathroom remodel.
- Dimensional Target Heights: A proper conversion lowers the step-over height by 8 to 12 inches, leaving a safe 4 to 6-inch threshold to help prevent trip accidents.
- Structural Cavity Re-blocking: Installers must install pressure-treated 2×4 framing and expanding structural foam within the cut cavity to keep the fiberglass or acrylic from flexing underfoot.
- Polymer Adhesion Science: Use only 100% silicone or hybrid polyurethane sealants to guarantee a waterproof bond that handles thermal expansion without cracking.
- Integrated Fall Defense: This low-barrier retrofit should be paired with anchored shower grab bars to provide complete support during the transition.
Quick Reference Specification: Tub Cut Conversion Inserts Step Through Threshold Installation Guide
Completing a tub cut conversion inserts step through threshold installation guide task requires understanding exact dimensional targets, cutting techniques, and curing schedules across different tub materials. The matrix below outlines these critical requirements:
| Mechanical Parameter | Polyethylene / Acrylic Inserts | Cast Iron / Steel Inserts | Physical Accessibility & Usability Impact |
|---|---|---|---|
| Apron Height Reduction | 8 to 12 inches lowered | 8 to 10 inches lowered | Lowers the risk of tripping during transitions |
| Remaining Step Threshold | 4 to 6 inches (102 to 152mm) | 5 to 7 inches (127 to 178mm) | Provides easy access compared to standard high-step tubs |
| Cutting Tool Requirement | Jigsaw (14-18 TPI) or reciprocating saw | 4.5″ Angle Grinder (diamond continuous) | Prevents the tub material from chipping, tearing, or cracking |
| Interior Reinforcement | Pressure-treated 2x4s & 2lb expanding foam | Preserves sub-tub structural load-bearing capacity | Eliminates sub-apron flexing underfoot |
| Primary Sealant Material | 100% Silicone or Hybrid Polyurethane | 100% Silicone with rust-inhibitive primer | Ensures a waterproof seal that handles natural expansion |
| Cure Time Before Use | 24 to 48 hours | 24 to 48 hours | Allows sealants to cure fully before wet-area exposure |
| Maximum Support Load | Up to 500 lbs (with interior blocking) | Up to 500 lbs (with interior blocking) | Supports heavy users without structural movement |
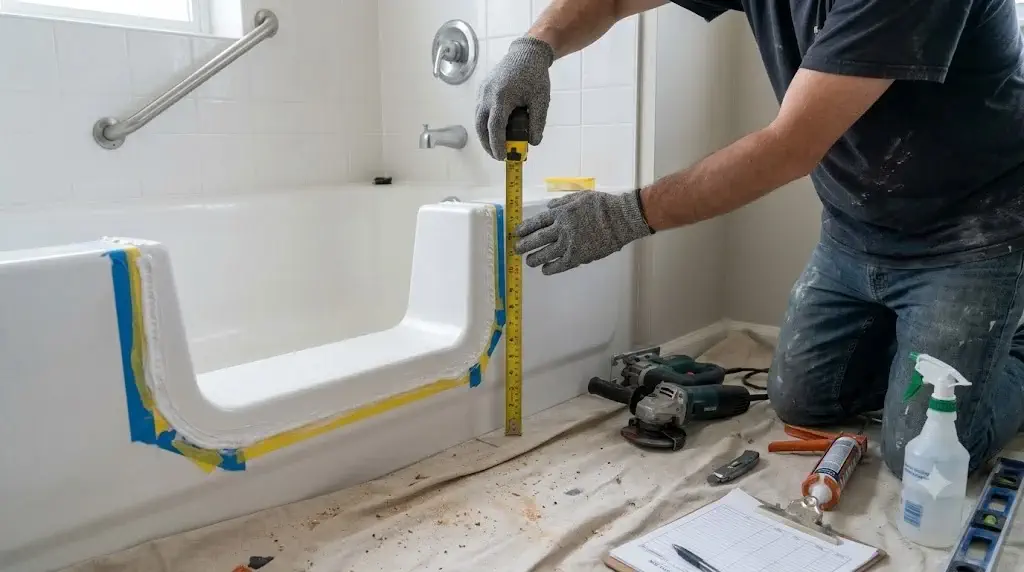
Accessible conversion: marking an 8 to 12-inch section of a bathtub apron for removal to create a low-threshold step-through entryway.
Structural Tub Apron Sizing Dictates Custom Insert Dimensional Thresholds
Sizing your cut-out requires verifying exactly where your wall studs, plumbing lines, and tub framing are located before making any cuts. The installer must accurately measure the tub’s front apron and back wall, ensuring the insert will sit level on the floor without compromising the sub-wall structures.
Most standard bathtubs feature a front apron height of 14 to 18 inches above the subfloor. To ensure the new threshold is safe and accessible for seniors, you must select an insert that lowers this barrier to 4 to 6 inches (102 to 152mm). If you cut the opening too low, you may weaken the tub’s base, while cutting it too high won’t provide enough relief for seniors with shuffling gaits.
When planning how to install a tub cut conversion insert, also be sure to check the clearance on the bathroom floor. You need a 24-inch to 30-inch buffer space in front of the cut to give the user enough room to step through safely, or to slide in from a bench if needed. For those with severe mobility challenges, you might want to compare this low-threshold conversion to barrier-free roll-in showers, which remove the step-over barrier entirely.
Porcelain Covered Cast Iron Bathtubs Require Specialized Diamond Cutting Tools
Different bathtub materials demand specific cutting methods to avoid damaging the substrate. Fiberglass and acrylic are relatively forgiving, but cast iron bathtubs require continuous-rim diamond cutoff wheels, water cooling, and protective maskings to capture metal sparks and protect the installer.
Be sure to choose the right tools for your specific tub material:
- Fiberglass & Acrylic: A standard jigsaw equipped with 14-18 TPI (teeth per inch) blades cuts these materials cleanly without melting or chipping the finish.
- Cast Iron & Porcelain: These heavy tubs require a 4.5-inch angle grinder with a continuous-rim diamond blade. You must mist the cut with water to keep the blade cool and prevent the porcelain finish from crazing or shattering.
- Pressed Steel: Use a reciprocating saw with bi-metal blades (18-24 TPI), cutting slowly to prevent the saw from vibrating and bending the steel apron.
Regardless of the material, always trace your cuts using the template provided with your step-through insert kit. Apply heavy masking tape along your cut lines to protect the surrounding enamel from getting scratched by your saw or grinder.
Precision Interior Cavity Blocking Restores Strength to Cut Bathtub Aprons
Reinforcing the hollow interior of the cut is the most critical step of a successful tub-cut conversion. Once the section of the tub is removed, the installer must build custom 2×4 support blocking and inject high-density polyurethane foam to prevent the step-through area from flexing or cracking under pressure.
Follow this step-by-step field guide to install a walk-in insert:
- Trace and Level Template: Position the manufacturer’s paper cutting template on the front and back of your tub apron. Use a level to ensure it is perfectly straight, then mark your cut-out lines with a grease pencil.
- Cut and Remove Apron Section: Double-check for buried plumbing or electrical lines beneath the tub, then carefully cut along your marks. Remove the severed apron section and use an angle grinder to deburr any sharp, rough edges.
- Construct Custom Support Blocking: Build a sturdy wood support frame inside the hollow tub wall using pressure-treated 2×4 blocking. Secure it tightly to the subfloor with construction adhesive and screws, ensuring the cut ends of the tub are fully supported.
- Inject Expanding Structural Foam: Fill the remaining voids in the cavity with expanding, high-density, closed-cell polyurethane foam. Once the foam cures, trim any excess to create a solid, level bed for your new insert.
- Bond and Seal the Insert: Dry-fit the custom-molded polyethylene or acrylic insert to verify a snug fit. Apply heavy beads of 100% silicone sealant to all contact points, set the insert firmly in place, and clamp or weigh it down for 24 hours to cure.
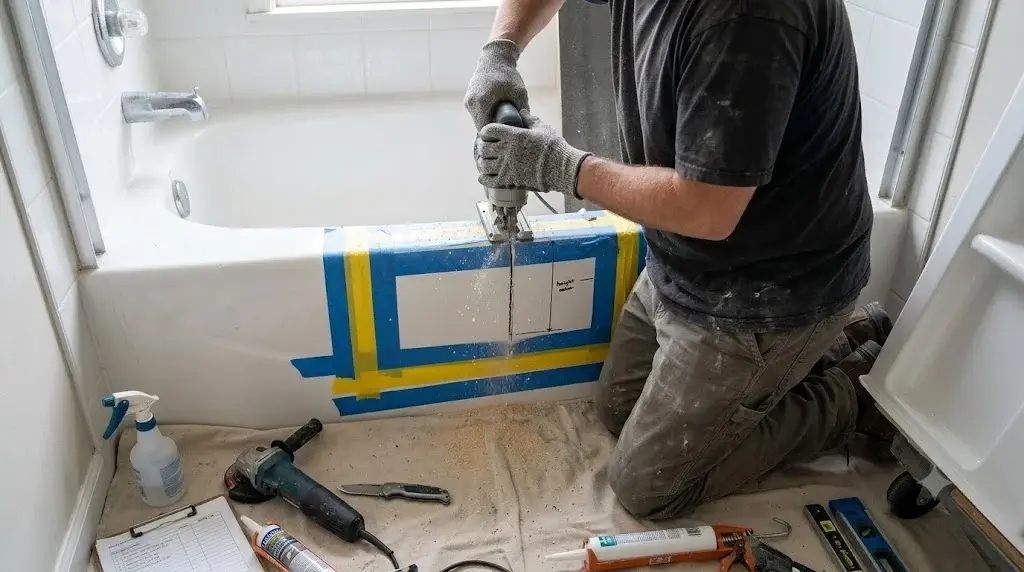
Making the cut: using a jigsaw with a fine-tooth blade to remove a section of an acrylic tub apron, following the template carefully.
Topical Polymer Elastomer Caulking Blocks Moisture from Entering Subfloor Framing
Water leaks can silently rot sub-wall framing and lead to expensive mold damage. Because acrylic, fiberglass, and iron expand and contract at different rates, you must use high-performance, 100% silicone or hybrid polyurethane sealants to guarantee a waterproof bond that remains flexible under structural movement.
Apply generous beads of 100% silicone sealant to all interior flanges and where the insert meets the tub wall. Once the insert is in place, tool the squeeze-out to create smooth, non-porous joints that won’t trap water or mildew. Never use standard acrylic caulk, as it will dry out, crack, and fail over time.
The tub cut conversion inserts step through threshold installation guide also advises allowing the sealant to cure fully for 24 to 48 hours before exposing it to water. During this time, the polymer forms its chemical bond, creating an airtight seal that is just as durable as the fiberglass and tile grab bar anchoring systems used elsewhere to support safe, independent transfers.
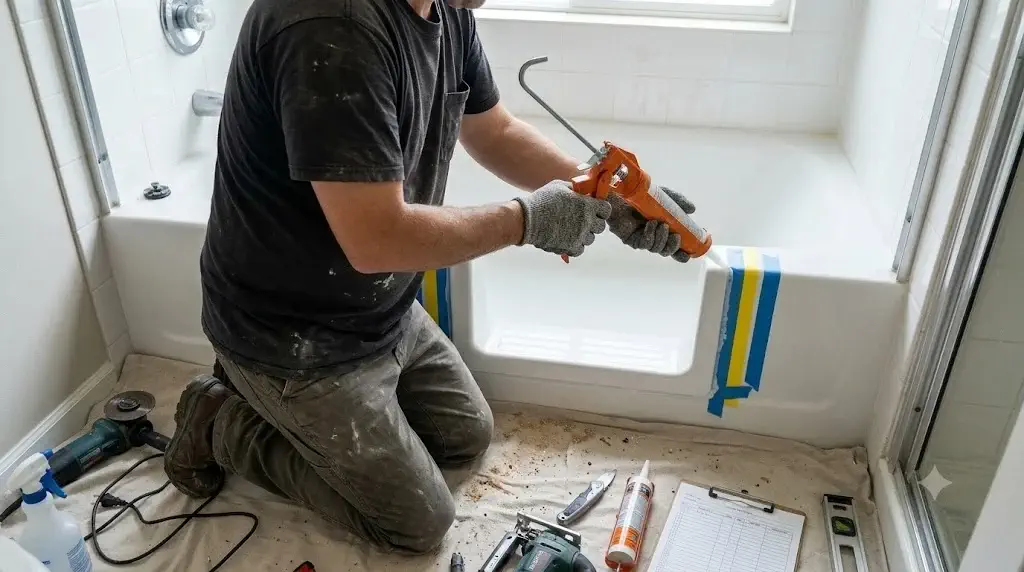
Waterproof finish: applying a generous bead of 100% silicone sealant along the edges of the walk-in insert to ensure a watertight barrier.
Companion Safety Grab Bars Enhance Stability Across Low Step Thresholds
A low-threshold walk-in entry is only the first step toward bathroom safety. Because transitioning in and out of a tub requires shifting balance on wet surfaces, you must pair your insert with key safety hardware:
- Dual Support Grab Bars: Mount a vertical 18-inch grab bar near the entrance and a 24-to-36-inch horizontal grab bar on the back wall. Using professional-grade drill bits and anchors for bathroom hardware ensures these rails won’t move or loosen when used for leverage.
- Pressure-Serrated Grips: Ensure that any grab bar has a textured, slip-resistant surface that provides reliable support even when hands are wet or soapy.
- Dual-Function Shower Doors: For some homes, a convertible tub-cut insert that features a removable door may be a better option, as it allows for normal soaking when needed, though these covers must be handled carefully.
Combining a sturdy step-through conversion insert with properly anchored grab bars and slip-resistant floor treatments builds a robust, multilayered safety system that preserves independence and provides peace of mind for seniors.
Frequently Asked Questions About Tub Cut Conversion Inserts
How much does a tub-cut conversion insert reduce the step-over height?
A standard tub cut conversion inserts step through threshold installation guide process reduces the step-over height of an existing bathtub by 8 to 12 inches (203 to 305mm), leaving a safe, low-profile barrier of just 4 to 6 inches (102 to 152mm) above the floor. This reduction allows seniors to step through safely without unsafely lifting their legs.
Can you install a tub-cut insert on a cast iron bathtub?
Yes, but cast iron bathtubs require specialized tools, specifically a 4.5-inch angle grinder with a continuous-rim diamond cutoff wheel. Because cutting generates intense heat and sparks, use a water mist to keep the blade cool and prevent the porcelain finish from chipping or cracking. Treat the raw, exposed iron with rust-inhibitive primers before bonding the insert.
What type of sealant must be used for tub-cut waterproofing?
You must use high-performance, 100% silicone or hybrid polyurethane-sealants designed for continuous wet-area exposure. These flexible materials handle the natural movement and expansion of different tub materials, resist mold growth, and prevent water from leaking into the subfloor or wall framing.
Does a step-through tub insert compromise the structural integrity of the bathtub?
No, provided the internal cavity is properly reinforced. Installers must build custom, pressure-treated 2×4 blocking and inject expanding, high-density polyurethane foam within the hollow tub wall before bonding the insert. This internal framing prevents the cut ends from flexing or cracking under weight, fully preserving the tub’s structural strength.
